 ObsiKO
Making Presentations
Presentation ready with just one Markdown document?! No need to even open PowerPoint. Let me show you the magic of conjuring up gorgeous slides right inside ObsiKO and wrapping up your whole presentation. 🪄
← Home: ObsiKO 101
1-Minute Summary ⏱️
- I'll show you everything: how to turn an ordinary document into a Marp-style presentation, how to slice it up into slides with ease, and how to switch into presentation mode and export it beautifully!
- No need to learn anything new! Just write with the same Markdown syntax you already use (Markdown Basics · Advanced Markdown), and that becomes your slides. 😎
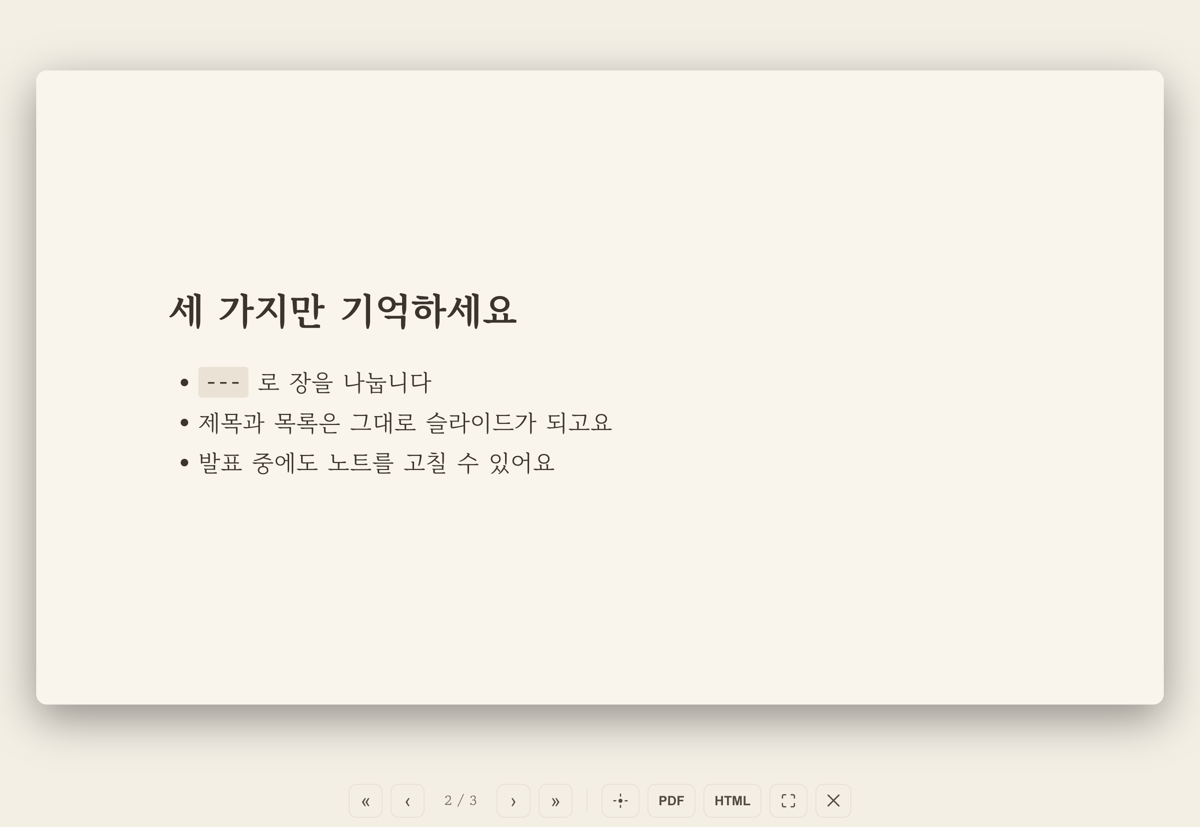
▲ The Markdown you already use, transformed straight into presentation slides!
1. Casting the Presentation Spell 🧙♂️
Just add one single-line spell, marp: true, in the frontmatter (ID card) area at the top of the document.
If there's no frontmatter box yet, right-click (or long-press on iOS) and choose 'Insert Frontmatter' — a frontmatter box gets created automatically. Click the '+Add Property' button below the box. Type just 'm' and 'marp' will pop right up in the list — select it, then set the value to 'true', and you're all set!
---
marp: true
---
Once this magic spell is in place, open the View menu (👁) at the top and a "Slide mode" item that's normally not there appears — ta-da! (Or start straight away with the shortcut ⌘⇧S.)
2. Snip, Snip: Splitting into Slides ✂️
Type --- (three hyphens) on a line by itself, and the slide smoothly advances to the next page!
---
marp: true
---

# Behold, the first slide!

Write your first slide's content here.

---

# Here comes the second slide!

- Item 1
- Item 2
- Remember! The real first slide starts right after the
---that closes the frontmatter above. - Did you write
---inside a code block? Don't worry — ObsiKO is smart enough to recognize it as just code, not a slide divider, and ignores it! - Wrote too much content for one page? No worries. ObsiKO will neatly split up long content and carry it over to the next slide for you!
3. What Can You Put on a Slide? 🎁
The answer is "pretty much anything you can do in Markdown!"
- Big headings, lists, striking quotes, clean tables, eye-catching highlights, links, and images — it's all supported!
- Code blocks with that programmer feel (complete with pretty syntax highlighting!)
- Charts and Mermaid diagrams to sketch out your ideas → Advanced Markdown
- Smart-looking KaTeX equations ($...$, $$...$$)
- By the way, slides are in a spacious 16:9 ratio, and they perfectly follow the theme (background color, text color, accent color) you've set up in ObsiKO!
4. Whipping Up Slides from an Existing Note (Note Embedding & TOC) ♻️
Don't rewrite your presentation material from scratch! You don't even need to copy-paste. You can pull in a note you've already put together and turn it straight into slides.
Note embed ![[note]] — putting what you've already written straight on stage
- Just write
![[note name]]on a slide, and that note's body text drops right into the slide. - Want just a specific part? Write
![[note name#heading]]and only the section under that heading gets pulled in. - To keep your presentation free of clutter, ObsiKO automatically hides the embedded note's filename (title) and frontmatter on the slide. Clean, right? ✨
- Don't worry if the note is long! The 'auto page break' feature below automatically splits it across multiple slides.
- New to wiki links? → Wiki Links & Tags
---
marp: true
---

# Today's Topic

![[Project Overview]]

---

## Just the Schedule Details

![[Project Overview#Schedule]]
Inline table of contents [toc] — a TOC slide in just one line!
- Write
[toc](or[[toc]]) on a line anywhere in a slide, and all the headings across the whole deck pop up as an indented list. - Perfect for the 'table of contents slide' at the start of your presentation. Add or change headings later and the TOC automatically keeps up — no extra work needed!
---
marp: true
---

# Table of Contents

[toc]

---

# 1. Introduction
...

---

# 2. Main Body
...
If it's long, it moves to the next slide automatically 📑
- Whether it's an embedded note or content you typed directly, if it's too long to fit on one slide, it automatically continues onto the next. Plenty of top and bottom margin is kept too, so it never looks cramped.
- The cutoff happens at paragraph and heading boundaries — sentences never get cut off mid-way, and a heading always stays glued to the content right after it when moving to the next slide (no orphaned headings!).
- Don't want automatic splitting? Just add
autopage: falseto your frontmatter to turn it off.
5. Now, Take the Stage! (In-App Presentation Mode) 🎤
- Pick View menu (👁) → "Slide mode" at the top, or hit the shortcut ⌘⇧S with style.
- The screen fills up and your very own stage unfolds! Use these keys to navigate:
- → (Right Arrow) / Space / PageDown: "Next slide, please!"
- ← (Left Arrow) / PageUp: "Hold on, back to the previous slide!"
- Home / End: "Zoom to the beginning / all the way to the end~"
- F: "Go full screen! (press again to come back)"
- Esc: "Presentation over! Back we go"
- If typing feels like a hassle, a light click on the left/right edge of the screen with your mouse slides you along just as well.
- The bar at the very bottom lines up « first · ‹ previous ·
current / total· next › · last », so you can move around freely without a keyboard. The full-screen button next to them does the same job as theFkey.
Point things out with the laser pointer 🔴
- Press the laser pointer button (target icon) in the bottom bar, or the
Lkey, and your cursor becomes a glowing red dot! Point at anything on screen as you present. - Drag for a comet trail ✨: hold down (mouse, finger, or pen) and move, and a long trail follows your path, slowly fading away. Perfect for showing flow — "from here → to here!"
- It works during full-screen presentations too — toggle with
Lany time. It turns off automatically when you close the presentation.
6. Ready to Share Your Great Slides? 📤
Check out the menu bar at the bottom of presentation mode!
- PDF: Click it and the system print dialog opens. Each slide is neatly saved as exactly one page (16:9 landscape).
- HTML: This one's the real deal! It's turned into a standalone web file that runs perfectly fine even without an internet connection. You can scroll through it in a web browser, and printing it straight from there splits it neatly page by page.
- iPhone/iPad and Android: Because of platform security policies we can't bring up a print dialog, so on these devices the bar shows only the HTML button — there's no PDF button at all. No download dialog pops up either, but don't be disappointed! We'll save it right into your vault with a nice name like (note title) (Slides).html. Open it in the Files app or Safari to share it to your heart's content! → Platform Guide · Export
7. Tips for the Pro Presenter 🍯
- Don't get too greedy with a single slide. One big heading with about 3–5 lines of key content is the sweet spot for your audience!
- Try starting the first line of each slide with a
#or##(heading). It looks much cleaner, almost like a slide cover. - Don't worry about adding a huge image. ObsiKO will neatly shrink it down so it never exceeds the slide's height!
Seeing Is Believing! Give It a Try 🎬
Copy the code below, paste it right into a new note, and pick that magic View menu (👁) → "Slide mode" right now!
---
marp: true
---
# Behold, an ObsiKO presentation example!
Subtitle: Making your own gorgeous slides
[toc]
---
## Exciting things we'll cover today
- Making slides with nothing but Markdown?
- Gorgeous diagrams and complex equations, no sweat!
- Exporting the finished product cleanly as a PDF!
---
## Even a diagram this cool takes no time at all!
(remove the ‘(’)```mermaid
graph LR
A[A brilliant idea] --> B[Draft it in ObsiKO]
B --> C[One button click to a perfect presentation!]
```(remove the ‘(’)
---
## Thanks so much for staying with me to the end! 🙇♂️
← Previous: Structuring Knowledge — Zettelkasten and Ontology · Home · Next: E-book & Web Novel Viewer →